Saturday, August 29, 2009

A Pincushion and a Poem


In my last post I showed you one of the two candlestick pincushions I had just finished, promising to show you the second one "in a couple of days." Gosh, how fast time goes and once again...it got away from me, so I've gone past the couple of days I intended. Sometimes I swear the days just dissolve away!

This is the other pincushion made from wool and attached to one of my flea market find candlesticks. As you can see, it is in the same colors of wool as the last but the embellishments are different. For instance, I've only embroidered the curved line going around the wool "ball" and the leaves. The flowers were crocheted (in two sizes). The larger ones and the ones on the button are sewn on and the ones around the candlestick were glued on. I have an intense dislike for using glue, but sometimes glue is the only way to make it work. The flowers were crocheted with bedspread cotton and a size 8 hook. The flowers were sewn on, then a bead was also sewn into the center of each flower. (Again, glue on the bottom flowers.)

The covered button on top of the pincushion was covered in wool, then embroidered, then the red flowers were added. Around the edge of the button, I sewed on beads...these are size 6/0.
Have you noticed I like to add beads to an edge?

I like making the buttons so much, I think I am going to embroider a batch of them and add them to my etsy shop when I do that "update" I've been talking about...probably mid-to-late October.

Every time I make something and then take a good look at it, I always find something I could've done better, or left off, or added. But, I don't go back and remake the thing. I just chalk it up to the fact that I'm still learning and get on with my day. You'd think after all these years of doing this kind of thing I'd know just about everything, but, wouldn't you know....I don't, however, I'm learning more all the time. Certainly makes my little life interesting!

I've never considered myself much of an artist. I suppose because the word "artist" always sounds a little too grandiose to describe what I do. Well, ok, "fiber artist" sounds a tad better, but when I see what some "fiber artists" do....that doesn't fit me either. What kind of artist could I be? Do you remember when Roseann (the comedienne) said she was a "domestic goddess?" Maybe I'm a "domestic artist" since what I do revolves around "homey" kinds of things. Is this silly? I don't know. I have a friend from Mountain View, Arkansas, who gave me copies of some poems written by a woman named Mary Elizabeth Mahnkey....who wrote in the 30's. She was from the Ozarks. One of her poems describes what kind of artist I find myself admiring.

THE ARTIST
by Mary Elizabeth Mahnkey

"She scanned the table with keen old eyes
There was the brown fried chicken
The creamy custard pies
The cool bright green of pickles
And the ruby glow of jell.
Then she hastened to the cellar
Before she rang the bell
And brought the golden butter
With its drops of frosty dew
Chilled and sweet and delicate
In a deep bowl of old blue."

This is from "Ozark Lyrics" 1934. I tried to find a copy, but never did. I love this poem. A true artist, this.

The last couple of days, I have made the prize ribbons for our guild retreat challenges. I'll show you those a few days before I leave for the retreat. And, then, inspired by my friend, Sharon, I got into moving a few things around the "Nest" to "re-organize." Even a "domestic artist"
needs the proper environment in which to create. All I have created recently is a huge mess, so I had intended to jump into the massive undertaking of re-organizing after the retreat in September, but she got me itching to do it NOW, so I jumped all the way in on Thursday! Not a total reorganization, but an attempt to make things a lot better and when I do tackle it this fall, well, it ought to be somewhat easier after this. Maybe I'll show you some of it then.

Well, that's it for today as I actually hear an owl.....the night owl, of course. so off to bed! take care, pat

Wednesday, August 26, 2009

Another Candlestick Pincushion


Once again, I have finished two wool candlestick pincushions. I'll show you one now and the other in a few days (stretching out my subject matter here while trying to get things ready for my September class at Quilting Arkansas). As you know, I've been making pincushions all year (with more to come) for 2009 has been my "year of the pincushion." So to speak.

This one is made from wedges of wool fabric, pieced into a ball, then embroidered and embellished. The same way that purple one I showed you recently was made, although they look entirely different. Also, if you remember, the "Girl Gang" came to my studio for a class earlier in the year, and made similar pincushions.

You know, I try not to make two of anything JUST ALIKE. So, while they may be similarly made, actually, they are different. You will also notice this when I post the other wool pincushion I will show you. The same fabric, but a different look. For those interested, I actually do all the embroidery after the ball is stuffed and added to the candlestick. Just seems easier to me, I suppose. Well, you'd have to embroider the seams after construction anyway.

The colors of this wool are green, red, yellow,pink and blue and rather subdued at that. Well, I like things to look old when I make them....so, naturally, subdued is good for that. And, then, there is the fact that my friends all tell me I am the Queen of Mud because of my color choices.
Not so true, really, as sometimes I can choose some VERY colorful fabrics and threads. I'm going to be showing you some of those very soon. Well, I'm only mentioning the colors because of all things, I decided to embroider the little daisy-like flowers with DMC #4200, a Color Variations floss. This particular number is a combination of red,orange, and pink! Just wonderful and looks really good next to all the colors of the wool fabric.

As you can see, I did a feather stitch over the seams, an outline stitch for the stems, a lazy daisy stitch for the leaves and flowers. Then, I added a large seed bead in the center of each flower. It is orange! So cool. There is also a tiny glass butterfly bead....so cute! The doily on top is appliqued down and over top of that is a one and a half inch covered button. Wool also. I embroidered that with similar flowers, smaller beads and another butterfly. I used Herringbone Stitch to embroider around the edge of the button, then sewed it on. I even used the herringbone stitch to anchor the wool and lace bits at the bottom of the ball. So much fun to make!

This pincushion (and the next one I show you) will be added to those I am taking to my class in September where I will have them for sale. If they don't find a new home....they'll be going into my etsy shop upon my return. Because I've bought so many candlesticks and other items to make pincushions from at the flea markets...I hope to have many for sale this fall.....if I can get the work done. You know, all of this is quite time-consuming when you work by hand! And, a hint....several will be made using vintage items such as sugar bowls and containers made from ceramic, metal, etc. There's even an angel!

One of my good friends and I have been having some conversations lately about etsy. You know there are people with etsy shops who sell LOTS of items. My friend told me we needed to get a lot of inventory done and we could sell a lot also. Well, that IS true. However, I work by hand to make my little heirloom pieces, so realistically, how many can I make and still have a real life? I don't know. So, I want to make what I can comfortably do and if a particular item doesn't sell, then, well, it won't sell. But, if it does, then hopefully both the buyer and I will be very happy! (Having said all that....I've let my etsy just lanquish for months....I plan on improving that situation after my September retreat.)

I may as well tell you now, since I'm already "collecting" for it - 2010 will be my "year of the basket." Embroidered, appliqued, crocheted, etc., I've been collecting patterns and actual vintage pieces for a very long time and am still on the "hunt" for them. So, be prepared to see lots of baskets in the coming year....I'm having fun just saying that!!!

Well, there you are...another candlestick pincushion, with more on the way! take care, pat

Sunday, August 23, 2009

A Vist from a Luna Moth


The other night we had an unexpected visitor. It was late...around 11:oo or 11:30 p.m. I had been working out in the Nest. That old Navy man was watching tv. Just as I turned out all the lights in the Nest and locked the door, something caught my eye out by our yard light near the garage. It looked white and was there on the ground between the light and one of our shrubs. I, with my excellent vision, thought it was a piece of paper, so I went over to pick it up and throw it away.

As I bent down to pick it up....it moved and startled me. So, I carefully took another look. It was a creature! I had never seen anything like it before and didn't want to touch it...so I went to get that Navy guy! "What could I possibly want to show him at that hour of the night?" he said. "Just come on," I said. So, out we go. And, to my amazement, he knew what it was...a Luna Moth.

He picked it up and it crawled around on his hand, not at all trying to fly away. It was beautiful! I ran and got my camera. I had the flash on, so the moth looks white, but it wasn't white as you can see in the other photos without the flash. It was a very pale green...just gorgeous and HUGE! So, we visited it for a while, then left it where we found it.

I looked it up on Google. And, here is what I found out:

"Luna Moths are members of the Saturniidae family, also known as the "Giant Silkworm Moths." They are huge moths, with a wingspan of four and a half inches. They have a white body, pinkish legs and huge pale green wings. The hindwings have eyespots and long tails.
They fly, only at night in Spring and early Summer. Adult Luna Moths don't eat; in fact, they don't even have a mouth. They only live for about a week and their only purpose is to mate.
Luna Moths were once very common, but are now considered an endangered species in some areas. People rarely see Luna Moths, mostly because they fly late at night. It is a treat to see one because they are beautiful insects. Humans have caused Luna Moths to become endangered by pollution and loss of habitat."

Well. That late night visit was even more special than I originally thought. They only live a week and this one was right in my yard....and I just "happened" to look it's way. Wow! So glad I thought to get the camera....so I can remember and you can see it too. Take care. pat

Thursday, August 20, 2009

Just for Fun: A Quilted Self-Portrait


Today I decided to show you something funny. Well, I think it's funny. How about a "portrait" of me. For one of my guild's quilting retreats a challenge was given to make a self-portrait quilt. There were only six or eight of them presented. I don't know, maybe people are just self-conscious making a quilt featuring themselves. Me...well, I look how I look and I have a sense of humor, so it wasn't traumatic for me. Hysterical, yes.

I decided that I would make a portrait quilt which would include my friend, Ethel. He is my son's cat, but he's always lived with us. Yes, he. One summer day, when my husband and I returned from a trip to Texas, my son, who was living with us at the time, "adopted" two tiny kittens. He was at a friend's house. The neighbor had a litter of eight kittens that he was going "to dispose" of and when Scott heard that he immediately took charge of two of them. He loves animals. He didn't tell us the kittens were in the house, but when we heard them..well...he had to tell us the story of why they were there. We lived on the farm at the time, so we kept them. No one could think of a name for them...and we THOUGHT one was male and the other female. Hard to tell on kittens that tiny.

The guys couldn't come up with any names, so I was given the task of naming them. Fred and Ethel, as we loved I Love Lucy! Time went by and Ethel just got used to his name, so we didn't try to change it...even after we found that he was a male cat. He's funny. And, old now. His brother, Fred, died several years ago.

Anyway, when I decided to put Ethel on the quilt, I named it "Friends and Flowers." He posed for my drawing!

As you can see, Ethel and I are appliqued and embellished. It was fun to make. I particularly like the little embroidered flowers and the buttons I used to embellish this wallhanging. The wallhanging is 18 inches wide and 19 1/2 inches tall. Notice the hand and flower button. Yes, the right hand is a china button which I bought at Quilt Festival in Houston one year. It sat around here for a long time before I knew what to do with it. (Doesn't everything?) I don't think you can tell, but right before I sewed this button on...I dropped it and it broke clear across the fingers. I glued it back together because as much as that button cost, I wasn't going to "waste" it.

And, Ethel....he's a nice cat. He runs to hide every time someone comes in the house as he's basically anti-social. And he absolutely refuses to enter the Nest! We've no clue why. Here's a photo of him, although not a good one. He hates having his photo taken so you have to sneak up on him...hard to do with a cat!!

So, there you are...something funny...hope you are as amused as I am with this little piece of work! take care, pat

Monday, August 17, 2009

A Lacey Candlestick Pincushion


Hot off my sewing table! Just finished three pincushions and this is the one I wanted you to see today...a lacey candlestick pincushion. It is made from a plaid pattern wool fabric. Of course, it takes such a small amount of fabric, the plaid no longer looks like a plaid. It's in lavender, pink and blue...very soft colors.

This type of pincushion begins life as a plain candlestick purchased at the flea market. You know know I love to find things there. I have a pretty large collection of them at the moment, and after my September teaching assignment, I plan on making several of these for my etsy shop. This one may end up there if it doesn't sell at the retreat.

The lace for this pincushion is some of that gorgeous white rayon lace you can purchase from all kinds of places. It is painted with Setacolor paints...you can even use an acrylic paint, watered down, of course, it you want it to be pale. I always heat set whatever I have painted after it dries.

The upper edge of the lace is beaded with seed beads, also in pale colors. There is a feather stitch embroidered down each of the seams on the wool...in pale shades of DMC floss.

Then, there's "that" button. It's a one and a half inch button, covered in wool. I made a beaded flower and a couple of leaves and added them to the top of the button.
Like me, you can learn to make these flowers from a tutorial featured on Amy's blog at
in-the-fold.blogspot.com. They are FUN! The leaves on the button are just sewn on in a leaf shape, but the leaves at the bottom of the pincushion are made from a tutorial of Amy's also. And, once you get the hang of it, both flower and leaf are quick to make. (It's sort of like eating those potato chips...you won't want to stop!)

I also beaded the edge of the button. Using a whip stitch, I threaded three beads on the needle then skipped about 1/4 inch (maybe a tad shorter than that), then took a whip stitch, three beads, again, etc. It's easy.

Adding the ribbon, flowers and leaves at the bottom of the pincushion just finished it off for me..a little something extra!

What do you think? Hope you enjoyed this little lacey thing...take care. pat

Thursday, August 13, 2009

Kelley's Pincushion "Re-Do"


One of my very best friends, Kelley, had a man make her a wooden pincushion holder. An old-fashioned one it was, made from a pretty wood. He used velvet to make the "pincushion part." It was a really neat idea. The only problem was he made the cushion part out of velvet. That would have been fine, but he made the "cushion" part about five inches tall and didn't fill it firm enough for it to work properly. It was very loosely stuffed, so if you put a needle in it...that needle would quickly get lost in the foam rubber which he used to stuff the pincushion. Now, I wonder why he used chunks of foam rubber? I didn't think to take a photo of this pincushion before I gave myself the assignment of re-doing this thing. And, FYI, the whole thing is twelve inches tall, with the pincushion being six inches in diameter.

Kelley would never ask me to do such a thing. Although, she should feel free to do that anytime. I actually owe her a few favors. For example: When I do a class or program in the Little Rock area, I always stay at her house. It's not often, once or twice a year or so. But, gosh, it's not easy to have people stay over in your home, especially if you've just had visitors, but Kelley always wants me to do it, so I do. She is a lovely hostess. Not only that, but if it's at night, she will drive me where I need to go. (Have I mentioned I can't drive after dark? Some people might question if I can even drive in broad daylight!)
Long story, short - I owe her. She's mentioned several times that the pincushion just didn't work like it should.....and a few weeks ago when the subject came up again...mostly me complaining about that pincushion...I just decided right then and there that we were going to "fix" it.

So, the other day I did just that. Now, it's all new and functional too. Here you see it in all it's glory. Kelley told me I could do whatever I felt like doing to it....which was all I needed to hear...immediately getting the scissors out and removing that velvet. You also have to take the wooden top off with a scewdriver, which I also did. I looked at it over and over for a couple of days and decided to re-do the top in wool and in fall colors. So, here it is....the bottom two wooden discs are adjustable to fit the edge of whatever table you are working at. And, now that it is "fixed" I hope she enjoys using it.

I made the pincushion in the crazy quilt style, embroidering over the seams with black DMC embroidery floss. I used several different stitches: Feather Stitch, Chain Stitch, Buttonhole Stitch, Herringbone Stitch, my beloved French Knots, Running Stitch, and Chevron Stitch. I used two strands of floss for the seam embroidery. When embroidering the leaves, I used all six strands of floss. I embroidered three different leaves...one in the Fishbone Stitch, one in the Closed Fly Stitch, and the stem with three leaves was done in Back Stitch.

It was difficult to make this and not embellish it to death....but I wanted to keep it simple...just seemed the right thing to do on this piece of work. I love the colors and wool is great fun to stitch on.

So, there you go! Kelley's pincushion re-do. I hope she likes it and feels better about using it. And, I hope you enjoyed seeing it. I really enjoyed doing that little thing for her. Y'all take care out there! pat

PS. For those of you who make comments and have given me no way to thank you...no email address, no blog address, etc., please know that I would thank you for those comments if I could. Also, you may remember I mentioned not being able to see my Followers list. I know you are out there, but I don't know who you are, so please just know that I really appreciate you!

Also, I am unable to comment on SOME of my favorite blogs and new ones I run across...for some unkown reason, I can't do it and it doesn't seem to matter whether they are blogspot or typepad. All my friends have pc's and I have a mac. No one can advise me. This really irks me as I like to post comments on blogs also. I'm not smart enough to figure out what is wrong. So, if you comment on one of my posts, rest assured I read the comments, appreciate them and would respond to you personally, if I could. To Dyann in Searcy - my email is on my profile page...we should probably touch base??? For those of you who used to receive comments from me, but no longer do...I'm still reading your blog posts, just unable to comment and I don't have your email address.

Sunday, August 9, 2009

"Two Readers, Two Stories"


Several years ago, I wrote a column for my guild's monthly newsletter. I've mentioned it here before. I just loved doing that. I thought my columns were fairly interesting, but I got very little feedback. At a certain point, I decided that basically, I was just "talking to myself" and that perhaps someone else could do a better job, so I stopped. Then, along came my computer, then email, then the magazine "Artful Blogging," which introduced me to the world of blogging. Oh, I could do that, I thought. So, my daughter helped me set up my blog. I began. And, once again, at least for a while, I thought I was right back where I started...excited, but "talking to myself."

Then, slowly, but surely, people began to make comments. I began to collect FOLLOWERS! (I still can't "see" them, but I know they are there as I see the count on my dashboard whenever I post.) There are people who actually read my posts! Well, I know two of them are my children, bless their hearts, but there are OTHERS. Wow! So, while there is pressure to "be interesting," I'm going to abide by my son's advice which was "to write about what I want to and please myself first...otherwise it won't be fun and I won't like doing it and if I don't like doing it, no one will enjoy reading it." (He's a very smart man!) I want to like doing it....the same way I loved to write those montly newsletter columns years ago...only with feedback this time.

And, I'm getting feedback! O happy day! It's wonderful to hear what people have to say and gratifying to know that I have somehow managed to touch base with other human beings "out there" on this very small planet we inhabit. It just makes my day!!! And, each person has their own story...I just love stories!!

Here are two. Yesterday, I had a small box delivered to my door, a total surprise. (Don't you love to get packages???) I had no idea who it was from as I hadn't ordered anything. Looking at the return address, I had no idea who this person was. I opened the box and was taken by such surprise, I was totally speechless. (It is not easy to find me speechless!) A lovely reader named Nancy, from Virginia, sent me the cutest bird house/nest music box and I'm posting her note so you can read her story in her own words. The instant I read the card, I remembered sending her a book...she had won a giveaway on my blog earlier in the year. Now, imagine....Nancy, using HER time and money to thank ME? I am touched. I am the one grateful for her and this group of dedicated "readers." It's such a pleasure for me to "talk" with them. Thank YOU, Nancy!!

Then, there is Anne. She has sent me many comments and emails...always giving me encouragement. She was particularly taken with that Robin pincushion, writing for permission to make one of her own. Well, since she asked politely, of course, I told her she could as long as she gave me design credit if she showed it anywhere. Over a couple of weeks, she emailed with questions, which I tried to answer as best I could...she sent photos of work in progress, which she wanted me to critique. I did. I suggested some stitches she might want to try, etc., and encouraged her to just "go for it" and see what she could do, interpreting my pattern in her own way. She had not done any silk ribbon embroidery before. A few days ago, she sent these photos in an email so I could see her finished product. I snapped these photos right off my computer screen. I am just thrilled with what she has created. She did a fine job and I love the result. We talked, she sewed, she shared, and we are both better for it. How cool is that? Another reader/friend. Thank YOU, Anne!

Both these ladies expressed a desire to be in a class with me....oh, wouldn't that be FUN!!! But, it occurs to me that this blog is probably the next best thing....and available to those of us miles and miles apart. Now, that is something writing that newsletter column long ago could never have done. Boy, am I lucky these days....thanks, ALL you readers! Take care, pat

Wednesday, August 5, 2009

"One Rose" Pincushion


My last post about the "Robin" pincushion received the most comments of any blog post I have done. Thank you to all of you who let me know how much you liked it. It sure means a lot to get some feedback on something you really put your heart into.

Having said that...I thought you might also like to see the pincushion I finished today. It is made from the same fabrics I used for the Robin, the same threads, beads, etc. I had exactly enough left over ribbon to make one rose. Mix all those things together, and this pincushion is the result. A fun project!

Here is a full view of the pincushion (it is five inches square)....I think it's kind of sweet and old-fashioned. Well, probably everything I make is "kinda old-fashioned" considering that I am now "old." (I'm telling you this because I am getting really tired of all the information I get daily in the "real" mail concerning the fact that I need to sign up for Medicare!!! Everyday, I get several pieces of mail reminding me that I'm turning 65 soon! I wish they'd give it a rest, as nobody knows that fact more than I do!!!) Anyway, concerning what I design and make - I love "old-fashioned" needlework...so, naturally, that is the style of work I love to do (regardless of my age!!).

That "drawing" in the background is a copy of the actual embroidered rose which I put in my printer so I could have a paper copy to doodle around on to draw the vine. Turns out I just drew it freehand on the fabric anyway. Sometimes I swear I work backwards! You can also see the threads, beads, etc., that I used. Let's see, a #10 Millener's needle for those French Knots, carpet and button thread for the beading, some silk ribbon, DMC embroidery threads, etc. The beads sort of look like coffee grounds here...funny what I can think of when I'm trying to take a photo!

You may want to ask me what kind of tray I am using here....it's a glass dish from the kitchen! A very pretty, old one. (See, there's that "old-fashioned" thing again!) I cut a Velux blanket into pieces to use when I bead. Keeps them all from sliding around. One day, I realized that I could fit a piece of that blanket into this dish and use it like a bead tray. Works perfectly. Oh, by the way, I didn't cut up a perfectly good blanket. I bought this one from my daughter's garage sale for $3.00. A king size! It was damaged in one corner...so lots of good 'beading fabric" left. In fact, I gave everyone in my Knot group some and have enough to include one in my next class kit.

I also wanted to tell you about the stuffing for this pincushion. I used to use Fairfield poly stuffing....recently I ran out of it and so did my local WalMart. However, they did have a supply of Morning Glory Premium Polyester Fiberfil. Being somewhat on the urgent side, I bought a bag. I LOVE IT! Unlike Fairfield, the stuffing stays where you put it without "bouncing" right back out of whatever you are stuffing. And, when your item is finished, it has a much firmer feel to it...another added bonus....also, it seems to me, you don't have all those little fibers creeping out when you pull the needle through.
I'm sold on it. In fact, since our Walmart seems to run out of things constantly, and since I have a bunch of stuffing to complete soon...I went back and bought the huge box!!! So, I'm recommending it to you. Let me know what you think of it should you try it.

Well, there you go. Another pincushion, some tips. A good day. Take care, pat

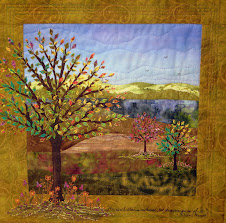
A Bit of Heaven

A Bit of Heaven
An original designed wall quilt with my vision of heaven on earth.