At last! I have finished the pincushions with the tiny hearts! I wanted to have something made up to show you how I sometimes use these tiny embroidered hearts...along with showing you how I stitch these hearts. And, now I have!!! And, as promised...there is a GIVEAWAY also. So, this post is in three parts. First, how I stitch the hearts. Second some samples of work I have done using these tiny hearts. Third....the GIVEAWAY!
PART #1
I have drawn three hearts on this piece of muslin. Why three? Who knows? One would do.
I don't know an easy way to show you how I do this. I know there is an easy way...but it's beyond
me - the electronically challenged person - so hang in there with me. I'm sure you will 'get it' without any trouble. In fact, you probably already know how to do this. I guess you should just humor me so I can think I'm doing a good job!
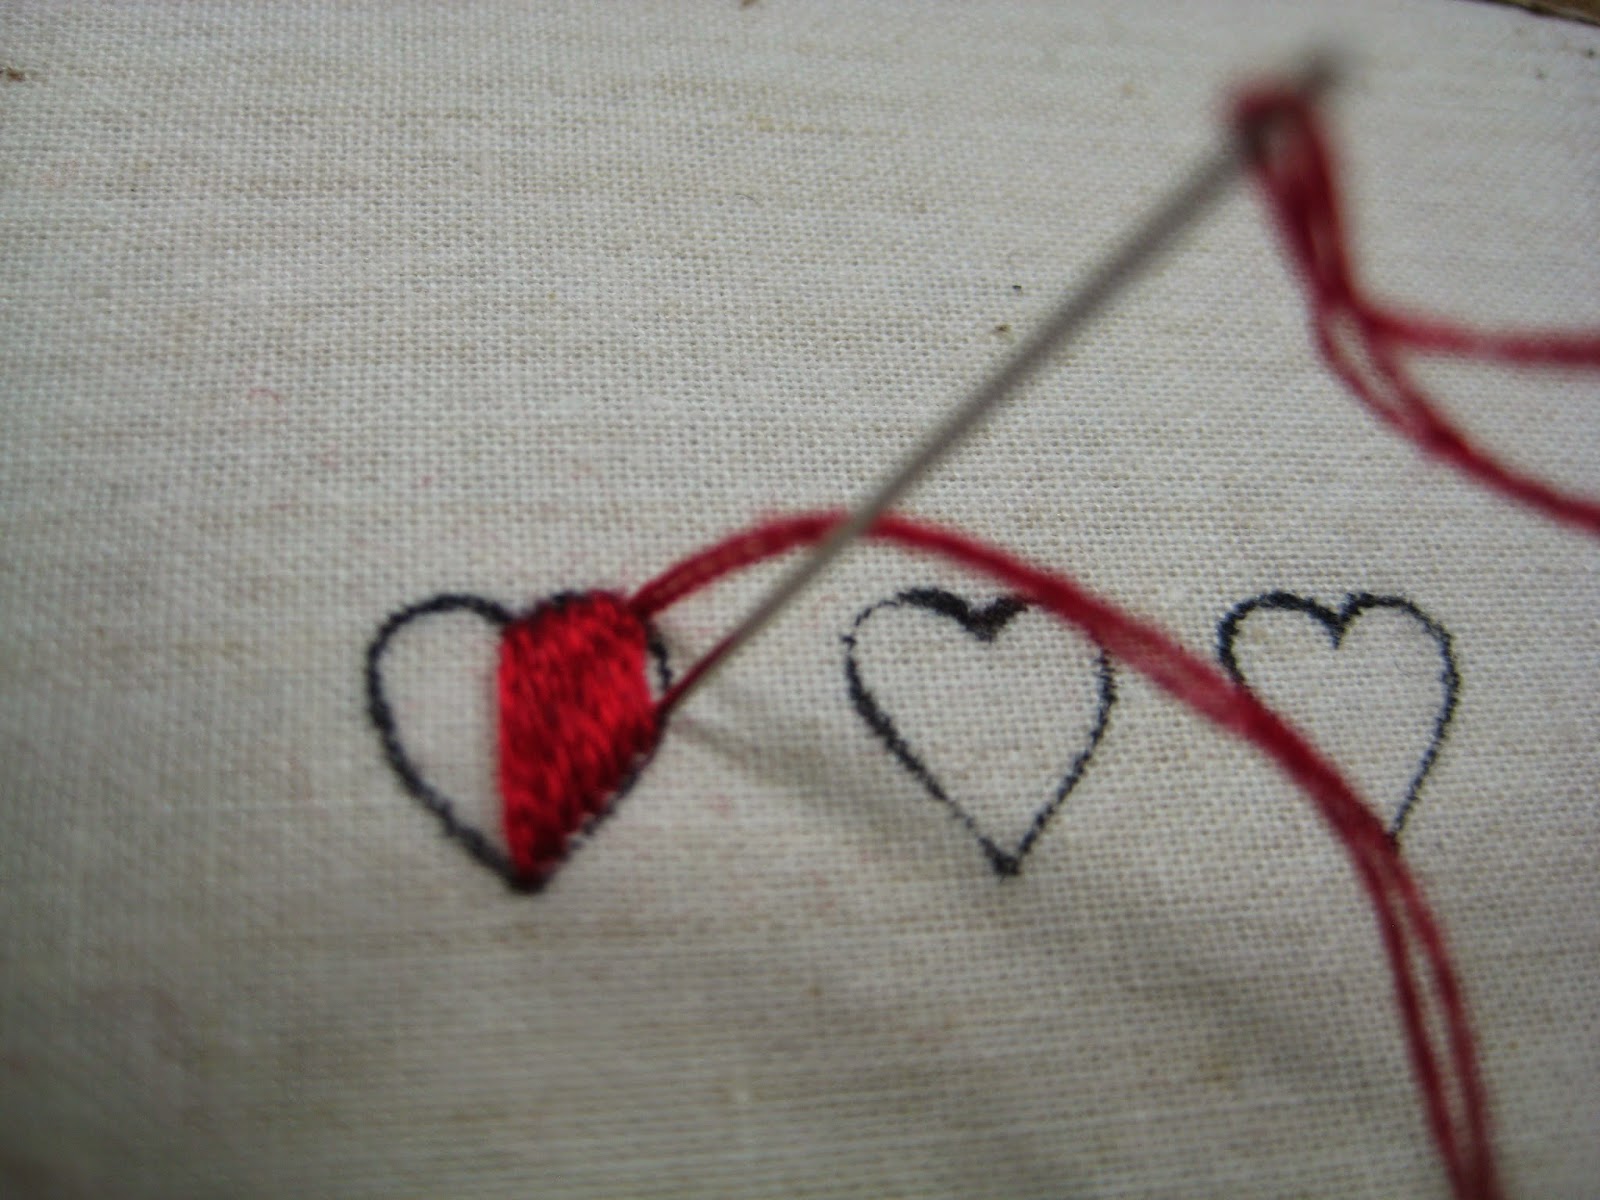
So, choose the size heart you'd like to stitch. To be honest....I think the tinier they are, the prettier they are. This one is a quarter inch high and about the same wide. TINY. I love making them, although I have to say since I have not been sewing for quilt a while....I almost had to re-learn how to do it and my hands and my eyes definitely know I'm older, so these hearts aren't quite as "perfect' as they used to be. I'm happy to report that nothing is really perfect...so it is what it is. I'm using two strands of DMC floss here. If I'm making a really tiny heart, I'll only use one strand. And, I use the thinnest, strongest needle I can put my hands on. Yes, I have marked the heart on the fabric. Sometimes I use a pencil and sometimes I use a permanent pen. This heart is permanent. I think it challenges you to do your best work, usually, that is. I'm sure some of you can stitch a heart without marking anything. Sorry to say, I'm not that person. I mark. And, am using a Satin Stitch.
I begin by coming up from the back either at the point of the heart, or the dip of the heart. I really don't think it matters. Then, I insert the needle in the opposite place. I like to keep all the thread on the front of the work, so you will notice in all these photos, I go down and come up by making the next stitch almost touching the previous thread. Hopefully, you will see that. You can carry the stitch across the back of the heart....and I do on a teeny-tiny one, but on this size and up, I don't carry thread across. They just seem nicer that way. If you do carry the thread across the back, your heart will be thicker and puffier. Perhaps you would want that. I'm not going to say much more, thinking you can get the idea just by looking at the photos.
Did that help you? If not, feel free to contact me and ask questions.....but I bet you "got it."
I stitched these hearts just so you could see how they look in different sizes. Like I said, I like the tiniest ones the best. You'll notice I have two that say "padded with felt." I'm not too crazy about that size...but if you want to make them....they do look better if they are thicker and fluffier....so I often cut out a piece of felt (cut into the exact heart shape and size, either glue or stitch it to the background, then do the Satin Stitch over it all. Don't even try this with the teeny ones!
Here are a bunch of little ones I just drew freehand...all TINY....and in my mind, much easier that the large ones. I have a fondness for long skinny hearts, but, truthfully, they are harder to keep 'neat.'
PART #2
These are all the tiny heart samples I made for this tutorial....with the ones in the hoop - the ones I tried my best to photograph as I made them.
Some examples of my teeny-tiny hearts in pieces I have made over time.
This is on a little doll quilt.
I stitched several over the surface of that little quilt...which is about 10" x 12" in size.
Here is a four inch crazy quilt pincushion....with one tiny heart. All if needed, really.
This is a crazy quilted needlecase I made way back when. And, this may have been one of the very first tiny embroidered hearts I ever made.
A bird ornament also made long ago. I did several of these...they flew away, of course!
I made this pin the month after September 11th. Actually, I lost one at the Houston quilt show and this is a 'reproduction.' So to speak. The hearts are stitched with a variegated thread, as are the stripes in the flag.
This is the little quilt, the bird, the pincushion, the needlecase and the flag pin...all bunched together.
Can you guess what my favorite colors are?
PART #3
The GIVEAWAY! There are three little pincushions I made shown here, and I actually just this minute noticed the Heart pincushion didn't make it into this photo, so there FOUR pincushions I am giving to FOUR of you. (I'm keeping the muslin one.)
This one, I am keeping. Well, I have to have some reward for all this work!
Just a little close-up!
GIVEAWAY #1
GIVEAWAY #2
GIVEAWAY #3
GIVEAWAY #4
If you are interested in winning one of these pincushions....please leave a comment on this blog post and I will choose FOUR Winners on Wednesday evening, February 18th. Kindly make sure I have a way to get in touch with you....and, no, you don't get to choose which one you might win...sorry....that would just complicate my life way too much!
I hope you enjoyed the Tutorial! By the way, I have been asked to do a Tutorial on the Chain Stitch Pincushion I showed a few posts back...and I will do that in March. Should be a lot easier for me and less photos in that one....so, I hope you will check it out.
Until next time,
♥♥♥


19 comments:
I would love one of these "darling" pincushions. Thank you for offering them.
Pat, I sure enjoyed looking at all of the hearts, especially on Valentine's day. I think my favorite is the God Bless America. By the way Happy Valentine's day. The giveaway is lovely. Thanks for sharing your work.
Thank you for doing the hearts, you make all your work so easy. I love the trimming on the hearts.
gasuski@mac.com
Hi Pat,
Happy Valentine's Day to you. Thanks for the tutorial on the hearts. I'm going to try your way instead of the way I do which is going back to the top and going back down each time. I love all your pieces but I guess the flag one would be my pick. Would love a chance at your giveaway Thanks so much.
Thanks for a great tutorial Pat!
I love your hearts and I'd love to win one of your pincushions!
Thanks for the tutorial....You do such beautiful work! Thanks so much for sharing!
Thank you sew very much for sharing your beautiful embroidered HeArts. Every project you have shown is beautiful. How very sweet and generous of you to give your hearts new homes. Happy Hearts and Happy Hugs...
Hi Pat, Happy Valentine's Day! Those little hearts are so sweet and I love the way you've tucked them into your patchwork projects. The tutorial was very helpful and it was nice having the size comparisons too. :)
Happy Valentines Day! What a talented artist you are! The intricate details on your handiwork, amaze me... To me, there is nothing like handmade. Thanks for the opportunity to win one of your pin cushions.
Cindi
jchoppes@hotmail.com
Happy Valentine's Day, my Dear Freind!!!! Your heart post is wondeful! You are a born teacher! Love the tutorial and the pin cushions!!!
the work of your heart and hand is lovely! sorry one walked away...
Lovely, lovely stitching! You know I'd LOVE the bird ornament, but surprisingly not the best. I like the way you have finished projects with beading. Thanks for the tut on embroidered hearts too.
Much Love,
Carol
Lovely pincushions! Thank you for the great tutorial as well. Would be excited to win any of the four beauties.
Congratulations on four years of blogging!
usairdoll(at)gmsil(dot)com
So pretty as usual. I have been doing some embroidery lately myself. Very relaxing!
I would love to win one of those pretties!
Oh Pat they are all so adorable. I would love to win any one of them. And in the future do you think you could do a tutorial on the lovely beaded edging ? I especailly love the one with a seed pearl in the middle of the seed beads.
Hi there...
I'm in love :^)
If you run through the pictures pretty fast, they become a video :^)
All of your "hearts" are as sweet as you are....
blessings to you,
J
I just love looking at your work, especially the bead work you do.
Oooh! It is such a joy to see you "in action" stitching the precious little hearts!!! Do you mind if I save the God Bless America photo to my desk top as a screen saver?? I Just ADORE it!!! Thank you for sharing your time and your tutorial! What a treasure you are! Cheers!
Pat, you do such beautiful work! I would love to have anything from you because it's something special and meant to be kept. Thank you for the chance to win.
botm2@yahoo.com
Post a Comment