Monday, August 17, 2009

A Lacey Candlestick Pincushion


Hot off my sewing table! Just finished three pincushions and this is the one I wanted you to see today...a lacey candlestick pincushion. It is made from a plaid pattern wool fabric. Of course, it takes such a small amount of fabric, the plaid no longer looks like a plaid. It's in lavender, pink and blue...very soft colors.

This type of pincushion begins life as a plain candlestick purchased at the flea market. You know know I love to find things there. I have a pretty large collection of them at the moment, and after my September teaching assignment, I plan on making several of these for my etsy shop. This one may end up there if it doesn't sell at the retreat.

The lace for this pincushion is some of that gorgeous white rayon lace you can purchase from all kinds of places. It is painted with Setacolor paints...you can even use an acrylic paint, watered down, of course, it you want it to be pale. I always heat set whatever I have painted after it dries.

The upper edge of the lace is beaded with seed beads, also in pale colors. There is a feather stitch embroidered down each of the seams on the wool...in pale shades of DMC floss.

Then, there's "that" button. It's a one and a half inch button, covered in wool. I made a beaded flower and a couple of leaves and added them to the top of the button.
Like me, you can learn to make these flowers from a tutorial featured on Amy's blog at
in-the-fold.blogspot.com. They are FUN! The leaves on the button are just sewn on in a leaf shape, but the leaves at the bottom of the pincushion are made from a tutorial of Amy's also. And, once you get the hang of it, both flower and leaf are quick to make. (It's sort of like eating those potato chips...you won't want to stop!)

I also beaded the edge of the button. Using a whip stitch, I threaded three beads on the needle then skipped about 1/4 inch (maybe a tad shorter than that), then took a whip stitch, three beads, again, etc. It's easy.

Adding the ribbon, flowers and leaves at the bottom of the pincushion just finished it off for me..a little something extra!

What do you think? Hope you enjoyed this little lacey thing...take care. pat

Thursday, August 13, 2009

Kelley's Pincushion "Re-Do"


One of my very best friends, Kelley, had a man make her a wooden pincushion holder. An old-fashioned one it was, made from a pretty wood. He used velvet to make the "pincushion part." It was a really neat idea. The only problem was he made the cushion part out of velvet. That would have been fine, but he made the "cushion" part about five inches tall and didn't fill it firm enough for it to work properly. It was very loosely stuffed, so if you put a needle in it...that needle would quickly get lost in the foam rubber which he used to stuff the pincushion. Now, I wonder why he used chunks of foam rubber? I didn't think to take a photo of this pincushion before I gave myself the assignment of re-doing this thing. And, FYI, the whole thing is twelve inches tall, with the pincushion being six inches in diameter.

Kelley would never ask me to do such a thing. Although, she should feel free to do that anytime. I actually owe her a few favors. For example: When I do a class or program in the Little Rock area, I always stay at her house. It's not often, once or twice a year or so. But, gosh, it's not easy to have people stay over in your home, especially if you've just had visitors, but Kelley always wants me to do it, so I do. She is a lovely hostess. Not only that, but if it's at night, she will drive me where I need to go. (Have I mentioned I can't drive after dark? Some people might question if I can even drive in broad daylight!)
Long story, short - I owe her. She's mentioned several times that the pincushion just didn't work like it should.....and a few weeks ago when the subject came up again...mostly me complaining about that pincushion...I just decided right then and there that we were going to "fix" it.

So, the other day I did just that. Now, it's all new and functional too. Here you see it in all it's glory. Kelley told me I could do whatever I felt like doing to it....which was all I needed to hear...immediately getting the scissors out and removing that velvet. You also have to take the wooden top off with a scewdriver, which I also did. I looked at it over and over for a couple of days and decided to re-do the top in wool and in fall colors. So, here it is....the bottom two wooden discs are adjustable to fit the edge of whatever table you are working at. And, now that it is "fixed" I hope she enjoys using it.

I made the pincushion in the crazy quilt style, embroidering over the seams with black DMC embroidery floss. I used several different stitches: Feather Stitch, Chain Stitch, Buttonhole Stitch, Herringbone Stitch, my beloved French Knots, Running Stitch, and Chevron Stitch. I used two strands of floss for the seam embroidery. When embroidering the leaves, I used all six strands of floss. I embroidered three different leaves...one in the Fishbone Stitch, one in the Closed Fly Stitch, and the stem with three leaves was done in Back Stitch.

It was difficult to make this and not embellish it to death....but I wanted to keep it simple...just seemed the right thing to do on this piece of work. I love the colors and wool is great fun to stitch on.

So, there you go! Kelley's pincushion re-do. I hope she likes it and feels better about using it. And, I hope you enjoyed seeing it. I really enjoyed doing that little thing for her. Y'all take care out there! pat

PS. For those of you who make comments and have given me no way to thank you...no email address, no blog address, etc., please know that I would thank you for those comments if I could. Also, you may remember I mentioned not being able to see my Followers list. I know you are out there, but I don't know who you are, so please just know that I really appreciate you!

Also, I am unable to comment on SOME of my favorite blogs and new ones I run across...for some unkown reason, I can't do it and it doesn't seem to matter whether they are blogspot or typepad. All my friends have pc's and I have a mac. No one can advise me. This really irks me as I like to post comments on blogs also. I'm not smart enough to figure out what is wrong. So, if you comment on one of my posts, rest assured I read the comments, appreciate them and would respond to you personally, if I could. To Dyann in Searcy - my email is on my profile page...we should probably touch base??? For those of you who used to receive comments from me, but no longer do...I'm still reading your blog posts, just unable to comment and I don't have your email address.

Sunday, August 9, 2009

"Two Readers, Two Stories"


Several years ago, I wrote a column for my guild's monthly newsletter. I've mentioned it here before. I just loved doing that. I thought my columns were fairly interesting, but I got very little feedback. At a certain point, I decided that basically, I was just "talking to myself" and that perhaps someone else could do a better job, so I stopped. Then, along came my computer, then email, then the magazine "Artful Blogging," which introduced me to the world of blogging. Oh, I could do that, I thought. So, my daughter helped me set up my blog. I began. And, once again, at least for a while, I thought I was right back where I started...excited, but "talking to myself."

Then, slowly, but surely, people began to make comments. I began to collect FOLLOWERS! (I still can't "see" them, but I know they are there as I see the count on my dashboard whenever I post.) There are people who actually read my posts! Well, I know two of them are my children, bless their hearts, but there are OTHERS. Wow! So, while there is pressure to "be interesting," I'm going to abide by my son's advice which was "to write about what I want to and please myself first...otherwise it won't be fun and I won't like doing it and if I don't like doing it, no one will enjoy reading it." (He's a very smart man!) I want to like doing it....the same way I loved to write those montly newsletter columns years ago...only with feedback this time.

And, I'm getting feedback! O happy day! It's wonderful to hear what people have to say and gratifying to know that I have somehow managed to touch base with other human beings "out there" on this very small planet we inhabit. It just makes my day!!! And, each person has their own story...I just love stories!!

Here are two. Yesterday, I had a small box delivered to my door, a total surprise. (Don't you love to get packages???) I had no idea who it was from as I hadn't ordered anything. Looking at the return address, I had no idea who this person was. I opened the box and was taken by such surprise, I was totally speechless. (It is not easy to find me speechless!) A lovely reader named Nancy, from Virginia, sent me the cutest bird house/nest music box and I'm posting her note so you can read her story in her own words. The instant I read the card, I remembered sending her a book...she had won a giveaway on my blog earlier in the year. Now, imagine....Nancy, using HER time and money to thank ME? I am touched. I am the one grateful for her and this group of dedicated "readers." It's such a pleasure for me to "talk" with them. Thank YOU, Nancy!!
Then, there is Anne. She has sent me many comments and emails...always giving me encouragement. She was particularly taken with that Robin pincushion, writing for permission to make one of her own. Well, since she asked politely, of course, I told her she could as long as she gave me design credit if she showed it anywhere. Over a couple of weeks, she emailed with questions, which I tried to answer as best I could...she sent photos of work in progress, which she wanted me to critique. I did. I suggested some stitches she might want to try, etc., and encouraged her to just "go for it" and see what she could do, interpreting my pattern in her own way. She had not done any silk ribbon embroidery before. A few days ago, she sent these photos in an email so I could see her finished product. I snapped these photos right off my computer screen. I am just thrilled with what she has created. She did a fine job and I love the result. We talked, she sewed, she shared, and we are both better for it. How cool is that? Another reader/friend. Thank YOU, Anne!

Both these ladies expressed a desire to be in a class with me....oh, wouldn't that be FUN!!! But, it occurs to me that this blog is probably the next best thing....and available to those of us miles and miles apart. Now, that is something writing that newsletter column long ago could never have done. Boy, am I lucky these days....thanks, ALL you readers! Take care, pat

Wednesday, August 5, 2009

"One Rose" Pincushion


My last post about the "Robin" pincushion received the most comments of any blog post I have done. Thank you to all of you who let me know how much you liked it. It sure means a lot to get some feedback on something you really put your heart into.

Having said that...I thought you might also like to see the pincushion I finished today. It is made from the same fabrics I used for the Robin, the same threads, beads, etc. I had exactly enough left over ribbon to make one rose. Mix all those things together, and this pincushion is the result. A fun project!

Here is a full view of the pincushion (it is five inches square)....I think it's kind of sweet and old-fashioned. Well, probably everything I make is "kinda old-fashioned" considering that I am now "old." (I'm telling you this because I am getting really tired of all the information I get daily in the "real" mail concerning the fact that I need to sign up for Medicare!!! Everyday, I get several pieces of mail reminding me that I'm turning 65 soon! I wish they'd give it a rest, as nobody knows that fact more than I do!!!) Anyway, concerning what I design and make - I love "old-fashioned" needlework...so, naturally, that is the style of work I love to do (regardless of my age!!).

That "drawing" in the background is a copy of the actual embroidered rose which I put in my printer so I could have a paper copy to doodle around on to draw the vine. Turns out I just drew it freehand on the fabric anyway. Sometimes I swear I work backwards! You can also see the threads, beads, etc., that I used. Let's see, a #10 Millener's needle for those French Knots, carpet and button thread for the beading, some silk ribbon, DMC embroidery threads, etc. The beads sort of look like coffee grounds here...funny what I can think of when I'm trying to take a photo!

You may want to ask me what kind of tray I am using here....it's a glass dish from the kitchen! A very pretty, old one. (See, there's that "old-fashioned" thing again!) I cut a Velux blanket into pieces to use when I bead. Keeps them all from sliding around. One day, I realized that I could fit a piece of that blanket into this dish and use it like a bead tray. Works perfectly. Oh, by the way, I didn't cut up a perfectly good blanket. I bought this one from my daughter's garage sale for $3.00. A king size! It was damaged in one corner...so lots of good 'beading fabric" left. In fact, I gave everyone in my Knot group some and have enough to include one in my next class kit.

I also wanted to tell you about the stuffing for this pincushion. I used to use Fairfield poly stuffing....recently I ran out of it and so did my local WalMart. However, they did have a supply of Morning Glory Premium Polyester Fiberfil. Being somewhat on the urgent side, I bought a bag. I LOVE IT! Unlike Fairfield, the stuffing stays where you put it without "bouncing" right back out of whatever you are stuffing. And, when your item is finished, it has a much firmer feel to it...another added bonus....also, it seems to me, you don't have all those little fibers creeping out when you pull the needle through.
I'm sold on it. In fact, since our Walmart seems to run out of things constantly, and since I have a bunch of stuffing to complete soon...I went back and bought the huge box!!! So, I'm recommending it to you. Let me know what you think of it should you try it.

Well, there you go. Another pincushion, some tips. A good day. Take care, pat

Friday, July 31, 2009

That "Robin and Nest" Pincushion


Well, can you believe, I have finally finished "that" Robin and Nest pincushion? It has taken me a lot longer to get it ready to mail than I ever thought it would. Nevermind that life gets in the way...it's been way too long a process to get this little jewel to it's new home!

I showed you a drawing of this pincushion in a previous post. And, several of you posted a comment letting me know that you liked the design. I created this pattern to fill a custom order for my blogging friend, Cheryl. You may visit her blog at
cheryls-chatelaine.blogspot.com.

She had requested something with a bird and a nest, some silk ribbon embroidery, some beading and in the colors of Robin's Egg Blue and brown, if I could find it. Finding anything "special" in this area, and sometimes finding the basics, isn't easy. I ended up using a mix of linen and rayon for the center and drapery silk for the borders. It's the closest I could get. It turns out I had "just the exact amount" of silk ribbon in my stash for the leaves and roses.

I've never embroidered a bird before. Well, unless you count a cross-stitched one or an embroidered one in outline stitch. So, I got out my cute little bird book - purchased long ago and never used - "Peterson Field Guide Coloring Books - BIRDS." There are large drawings of birds and in the back is a tiny little colored picture of each bird. That is what I used to get the pattern for the bird. The bird is one and a half inches from top of head to tip of tail. I like it. I had to come up with the tree and the Nest on my own. I ripped that nest out two times and on the third try...I thought...ok, that's it...as I am not doing it again. (I painted the background fabric with black and brown paint so you couldn't see through the nest to the background, before I actually started the stitching.)

I'm very picky. This is NOT a good trait! So, eventually, I got the little square together and began the ribbon embroidery. Now, this is something I'm friendly with....all it takes is love and some time. Then, the beading of the pincushion edge. That takes lots of time as you have to count each bead. I used a mixture of three colors of beads for this "fringe." A tortoise color, a flat brown, and an almost carmel color, with a larger blue bead in the center of each loop. There are twenty beads on each side of each loop. No, I did not care to count how many loops.

I learned something from making this pincushion. I learned that I CAN embroider a bird! And, a nest! And, I learned just how important it is to me that Cheryl will love this and treasure it. I like to think I do heirloom quality work and I want it to last a long time.....at least as long as she does...as it is specially for her.

Yesterday, after sending her some photos of the pincushion, she told me that she would be "parked with my umbrella next to the mailbox until the bird arrives!" It made me smile and meant a lot to me. The bird is flying home on Monday! There you are..I hope you enjoyed seeing what became of my drawing......and take care. pat

Tuesday, July 28, 2009

A Cottage Cup and Something for Julie


I have a new friend. Her name is Julie Whitmore. She lives in California. She makes pottery and she is dear. How do I know?
Well, let's see...because we have talked via her blog, mine, email and because she makes the dearest, sweetest. pottery I've ever seen. In my mind, a person can't really make anything "dear" unless they really ARE "dear." She does, so she is. That's how my mind works.

I found Julie because I read Nina's blog. Check out ornamental.typepad.com. Nina is dear also. She makes lovely jewelry for sale at ninabagley.etsy.com, takes lovely photos and is a wonderful writer who will get you in touch with what's important. Like I said, she is DEAR also. She showed one of Julie's creations on a post one day...so, naturally, I just had to go see what Julie was all about. And, that is how I found my new friend. And, bought a cottage cup. It is now one of my treasured possessions!

Here's the cup! So sweet, so tactile (yes, it really FEELS good), so charming, so....delightful! It makes me smile! And, I want more! She's made cups with the sweetest birds, well, you'll just have to go take a look for yourself. So, go visit Julie at....juliewhitmorepottery.blogspot.com. And, go to juliewhitmorepottery.etsy.com to see her shop. You will be delighted also!!

Not to get goofy (no, not me!), but I love the fact that I can see where Julie's hands formed this cup. I can see the paint strokes...I KNOW a real person made this with great love. Wow! You just can't beat that!

Julie tagged me yesterday - to tell her six SILLY things that make me happy. Well, silly to one person may be serious to another, but, just off the top of my head I wrote my list:

1. colorful socks
2. a comfy nightgown
3. fresh cherries
4. a haircut
5. toast
6. a cup of tea

Just in case that's not "silly" enough, there is:

7. those huge bubble wands
8. hearing kids laugh
9. birds in the bird bath
10. licorice
11. doodles
12. empty boxes

Ok, Julie, there you are...my silliness for the day. And, not silly, but true, you, and your sweet cottage cup, make me very happy too! Take care. pat

Saturday, July 25, 2009

Art from Germany


A few posts ago, I showed you an ATC card and pincushion that I had made for my friend, Gaby, who lives in Germany. She makes beautiful ATC artwork and has recently become involved in making assemblage boxes. I hope I am calling them by the right name...they are going to become some of her finest work, I think.

I consider Gaby my friend, even though we have never met. Just like I consider you one. (Isn't blogging great!!) This week, I received a package from her and got so excited about it that my husband thought something was wrong with me. Oh, oh, oh! was all he was getting from me. Finally, I slowed myself down long enough to explain to him what was going on, then he understood. Not knowing a thing about ATC's or mixed media, etc., he really didn't "get" what the excitement was, but he did say that my gift was really pretty and he thought it very nice of her to send it. Later, after looking at my gift several times, he agreed that it was very special, indeed. And, it is.

Gaby has a blog...colorfuladventures.blogspot.com. She, like so many of you, makes the planet a much happier place.

She made two ATC cards for me....I just love them! And, they arrived in a lovely little journal! She must have paid a lot of attention to my blog posts, because the journal is a lovely green (my favorite color), I adopt old photos of people all the time and these kids are precious. The birds and flowers...well, I just can't get enough of them. Even the paper she wrapped the journal it looked like a bird egg...it's in the background in the photos. Just wonderful work, Gaby, you made me very happy and I will treasure my "art from Germany!"

As I told Gaby, I lived in Germany in 1952-53, as my Dad was stationed there in the Army. I don't remember all of my time there, but I do remember going into a very quaint doll shop....I can still see it in my mind. Visiting Heidelberg, having a cherry tree in the back yard...and riding a train through beautiful countryside. And, oh yes, those little red boots with fur inside, I remember those too! Isn't it funny what a kid remembers?

Thank you, my German friend! Now, the rest of you go check her out...you won't be disappointed! Take care, pat

A Bit of Heaven

A Bit of Heaven
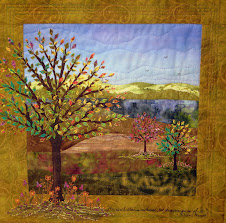
An original designed wall quilt with my vision of heaven on earth.